Introduction

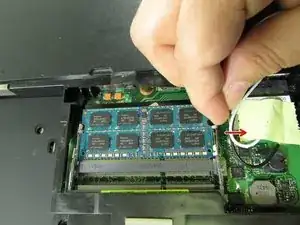
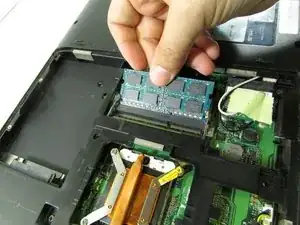
This guide will show you how to replace the RAM in your Asus U50F-RBBAG05 laptop.


Data is stored and retrieved via your computer's RAM. Your laptop may make strange noises, crash frequently, and display errors if the RAM is degrading. If your computer encounters RAM failure, it could occasionally fail to boot at all.

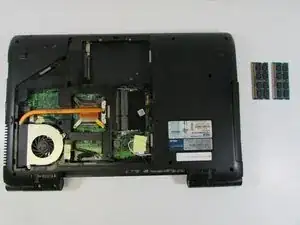
Consider increasing your RAM if your storage is getting low. Check your remaining storage space by following the instructions here. For this device, 8GB of RAM (DDR3 800/1066) is the maximum amount that may be installed.

Check that your laptop is completely off and removed from all external power sources before continuing.

  1. GD6s6ByGPIM1gMTV
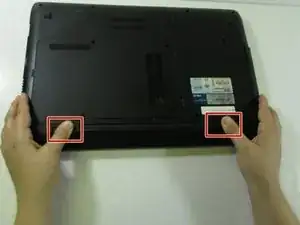
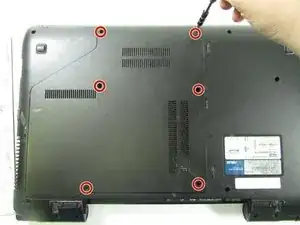
    • Turn the laptop over so the bottom is facing up.

    • Slide the two tabs on the bottom of the laptop toward the edges of laptop.

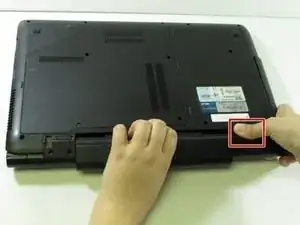
    • Slide the left tab to the left to lock it into the unlocked position. The red showing next to the tab signifies that it's unlocked.

    • You will have to hold the right tab to the right to keep the slot unlocked while removing the battery.

  2. AO2jokPXxAHMBbRi
    AO2jokPXxAHMBbRi
    NNqbDIwFLPwGwWs2
    • Hold down the tab on the right side, then begin sliding the battery out.

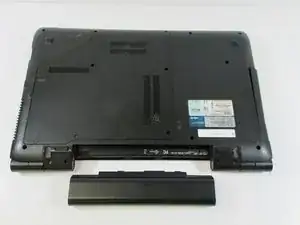
    • Remove the old battery.

    • Next, insert the new battery into the empty slot. Release the right tab to begin locking the new battery into place. Slide the left tab to the right to completely lock the battery into the slot. The red that was showing near the left tab should be gone. This signifies that the battery is locked into place.

  3. FdM3ilPRfRIGlV5u
    • Remove the six screws using a Phillips #1 screwdriver.

  4. 6AKOTbMRGsRZUiy3
    • Pry the lower panel up with your fingernail or a spudger.

  5. DDExULsSWhFFhvVn
    DDExULsSWhFFhvVn
    BUDURMHcyBTH1ajB
    • Lift up on the panel and remove it.

    WHAT I HAVE DONE IS STUPID STUPID STUPID i HAVE TAKEN MY ASUS f50u LAPTOP ALL APART TO REPLACE MY SCREEN AND HAVE NO CLUE TO WHICH SCREW GOES WHERE IS THERE A DIAGRAM OR SCHEMATIC THAT SHOWS WHAT SIZE SCREW GOES WHERE THANK YOU WAYNE LAVE@COGECO.CA

    vette59jdwl -

  6. CMEa1bMiW5JrAO1e
    CMEa1bMiW5JrAO1e
    JXLkr1WFbW2mLKJk
    • Push back on the silver clips shown in the picture until you hear/feel a pop.

  7. 1PtE1XoZHyL4BaXx
    1PtE1XoZHyL4BaXx
    AtnQIPeUqigHIlWD
    • Pull back on the RAM card and remove it.

    • Repeat for the lower RAM card.

Conclusion

To reassemble your device, follow these instructions in reverse order.

Kelly Greeling

Member since: 07/02/17

1044 Reputation

0 comments