
Introduction
-
-
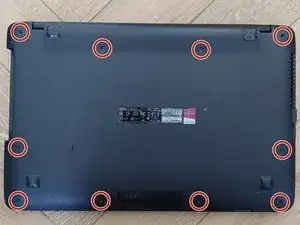
The first step to remove the keyboard is to remove 8 Philips screws on the bottom of the laptop.
-
Step two is to carefully pry the keyboard loose from the bottom of the laptop. Be careful while lifting the keyboard since it is still wired to the motherboard.
-
Lastly disconnect both the touchpad and the keyboard wires. Now the keyboard can be lifted completely out of the way.
-
-
-
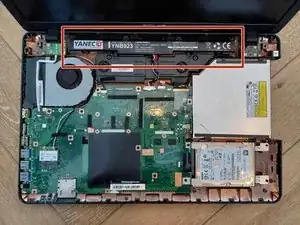
This should be the view right now. The battery is located near the screen.
-
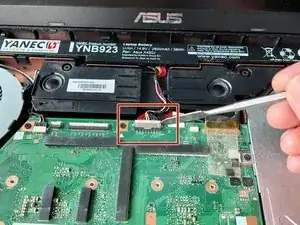
Second, disconnect the wires between the battery and the motherboard.
-
Next, unscrew the two Philips screws holding the battery in place.
-
By tilting the battery towards the screen the battery can be lifted out of the laptop.
-
-
-
Place the new battery where the old one was located tilted towards the screen.
-
Tilt the battery staight and fasten the two Philips screws holding the battery in place.
-
Reattach the wires to the motherboard.
-
Reconnect the keyboard and touchpad connectors.
-
Fix the keyboard to the bottom of the laptop by gently pressing the together.
-
Screw the 8 Philips screws back into the bottom of the laptop and you're done.
-


Om het apparaat weer te monteren, volg je deze instructies in omgekeerde volgorde.
