Introduction
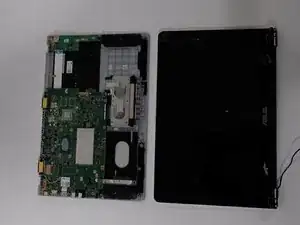
In this guide you will learn how to remove and replace the Asus Q505UA-BI5T7's LCD touch screen. This is a moderately difficult process with a minimal amount of tools needed. The replacement of this part should take around 30 minutes to complete. Please read the Asus Q505UA-BI5T7 Troubleshooting page before deciding to replace the screen.
-
-
Flip the device over so that the back cover is facing you.
-
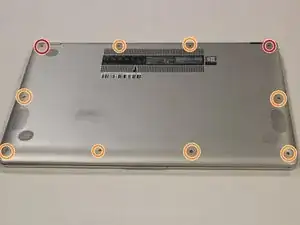
Remove the two 10 mm Philips #1 screws from the top two corners of the back cover of the laptop.
-
Remove the remaining eight 8 mm Philips #1 screws remaining in the back cover of the laptop.
-
-
-
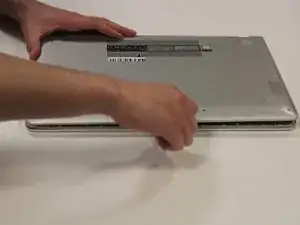
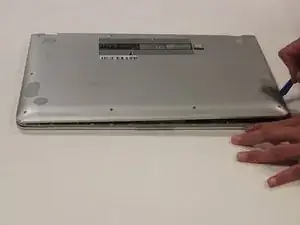
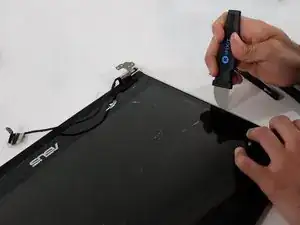
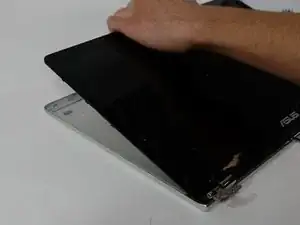
Use the plastic opening tool to gently pry the back cover of the laptop up. Slide the tool slowly along the edges of the back cover to pop it out of the clips holding the cover in place.
-
-
-
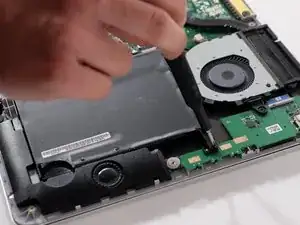
Make sure your device is turned off. Remove the 5 mm screws on each respective side of the battery by twisting counter-clockwise with a #0 Phillips screwdriver.
-
-
-
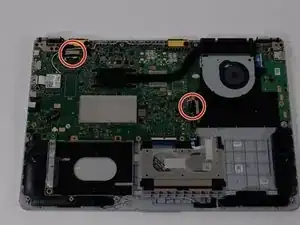
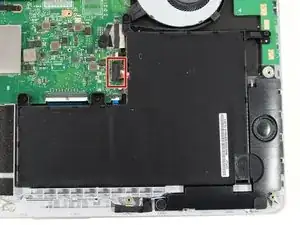
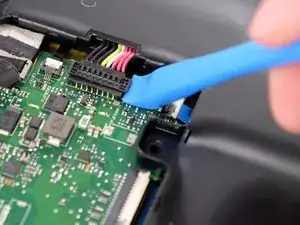
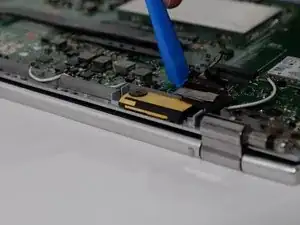
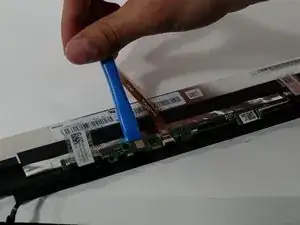
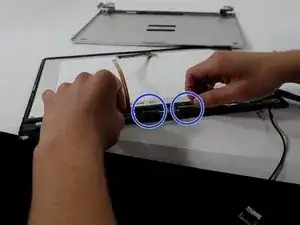
After following the battery removal guide, use your Ifixit opening tool to pry the two screen connectors off of the laptop motherboard.
-
The screen connector next to the fan must be unwrapped from around the fan so it is free
-
-
-
Use a Phillips #0 screwdriver to remove the three 5 mm screws securing each hinge on the laptop.
-
-
-
Then, gently open the screen a bit and remove the screen from the hinges, being careful with the screen connectors.
-
-
-
After removing the screen from the laptop, use a metal pry tool to get within the gap of the screen and the casing.
-
Go all around the screen with the pry tool and detach and lift the screen from the casing.
-
-
-
Using your Ifixit opening tool, remove the camera stuck on with an adhesive strip off of the top of the screen.
-
Using the same tool, pry and unclip the bottom touchscreen module from the screen.
-
Before removing the module from the screen, unclip the two ribbon cables still keeping it tethered.
-
You can now remove the touchscreen module connected to the camera from the old screen and transfer it to your new one.
-


To reassemble your device, follow these instructions in reverse order.
