Introduction
Usually, thermal runaway is caused by bad contact somewhere from the main board to the printing head.
In my case, no problem was found in the cables themselves, but I found an assembly problem.
I'll describe how to detect it and how to assemble it correctly.
-
-
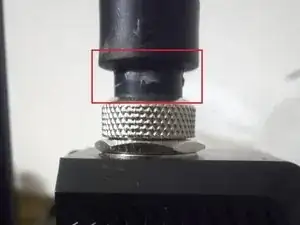
To detect if it is a similar issue, while the cable is fully assembled, push and pull it from the connector and see if there is a play parallel to z axis.
-
I drew a line when it was fully inserted, and that line popped up during print with X axis movements. It will do the same with manual pull.
-
-
-
Unload the filament.
-
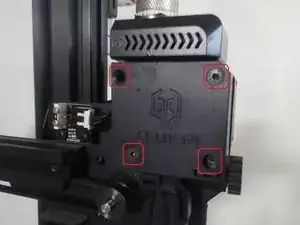
Unscrew the four screws in the front. Mind their size and position, as they are of a different length.
-
Mind the tension screw, the extruder wheel and the other internal parts.
-
If in doubt, look at the manual.
-
-
-
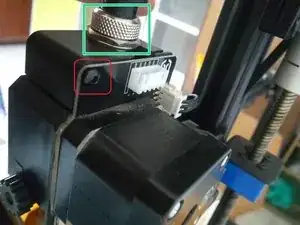
Unscrew the marked green cable and the fastening nut.
-
Unscrew the marked red screw, using the same 2.5mm Allen key.
-
You may now, slide towards the front of the printer the plastic cover that was held by the above screw. Mind the PCB inside is still attached. Also mind the filament guide and the internal sleeve, that may fall from the cover.
-
-
-
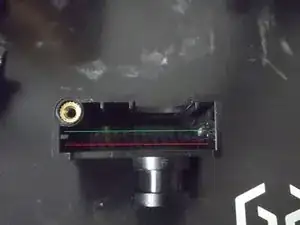
The PCB should be installed in the marked green slot. If installed incorrectly, it may be installed in the red space.
-
Before reinstalling the cover. you have to place the filament guide and sleeves that are not shown here, and install them all as a group.
-
-
-
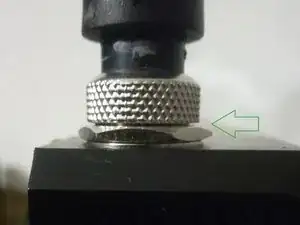
Install the lock nut. Hand tighten the nut as much as you can.
-
Install the cable and lock its locking ring.
-
Mind that there should be a .5mm space between the nut and the lock ring. Marked with green arrow in the picture.
-
To make sure the installation is good, try to push the cable further down. You should fail to do so.
-
Load new filament and perform a test print.
-