Introduction
The internal power supply is critical for your device to turn on. Follow our troubleshooting page to identify if the internal power supply is broken or if it is the external power cord. The power cord will be a much easier replacement if so.
-
-
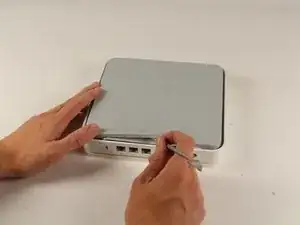
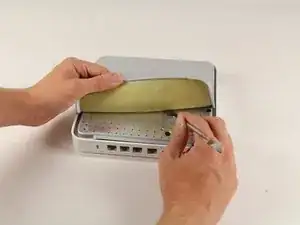
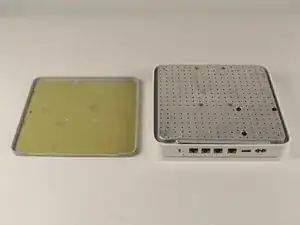
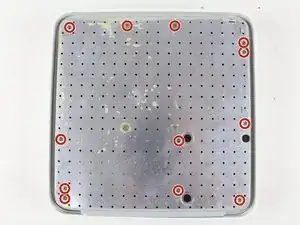
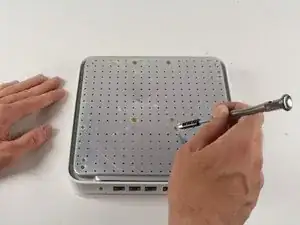
Turn the device upside down to reveal the rubber section of the back plate. Using a metal spudger, carefully wedge the blunt tip into the space between the aluminum back plate and the rubber, separating the two pieces.
-
Depending on air temperature and how set the adhesive is, you may need to spend some time warming the back plate with a hot plate (on low) or hair dryer.
-
-
-
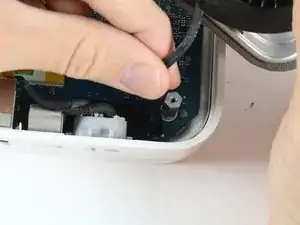
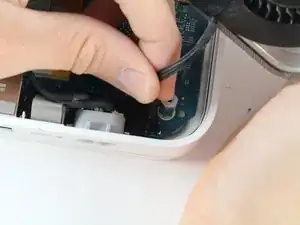
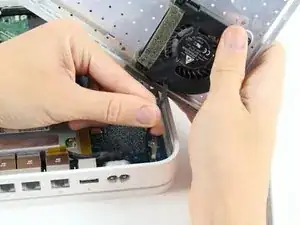
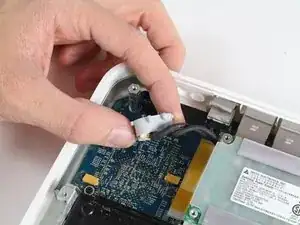
The fan affixed to the back plate is connected to the logic board. A small wire must be detached to fully remove the back plate.
-
Pull the base of the wire close to the logic board and the connector will pop off.
-
-
-
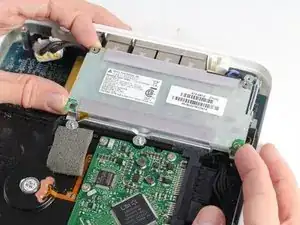
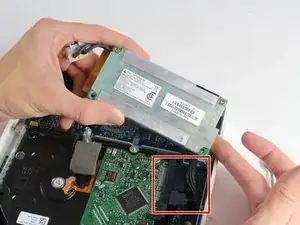
Remove the external connector from its housing by lifting it up, then out.
-
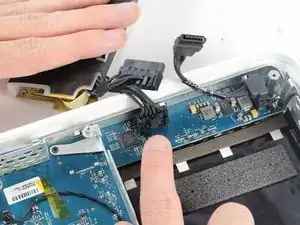
Lift the internal power supply brick out of the device.
-
To reassemble your device, follow these instructions in reverse order.
4 comments
My time capsule stopped working. I tried everything but it was completely dead so I bought a new power supply on eBay but now the amber light is solid and won't turn green. I've tested the hard drive and it's fine. I've got another new power supply today and still a solid amber light. Any ideas please?
Andrew -
After the Apple Reseller said the device was not covered by service anymore and data rescue would cost 70 bucks I decided to go for it myself. Went very well. Except the grey rubber backplate was ripping apart on removal. Must be because of the device getting so hot. Will fix it with some self-adhesive rubber mat from the crafts store.
Thanks for the guide!
Hello is HOT I took the rubber mat off and rise it with rubber foot for better circulation of air, it helps alot.
The epoxy cementing the rubber pad to the aluminum base is a lot stronger than the rubber itself. The rubber is likely to tear as you remove it; I had to use a putty knife to clear the screws. It's worth hanging onto the branding near the Ethernet ports, for future identification (model number, serial number, Ethernet ID, AirPort ID); you can fashion a replacement pad out of neoprene rubber.
adlerpe -
Mine completely ripped I have no back cover now its in multiple pieces…. mine was giving off way to much heat and hard drive errors so I decided to replace hard drive and fan wish me luck BUT if yours is overheating do not expect to get back off without ripping the rubber to
William -
Using a fan to heat the plate up was helpful
Michael Zimmermann -
I wish I read Michael Zimmermann’s suggestion before I tore the first half into about 15 pieces! On the second half I used a hair dryer to heat the rubber. With enough heat and a very slow steady pull on the rubber it came of as a single piece :-)
mfred2 -
Do I need to put back on the rubber? will it overheat if I don’t?
Strider -
It is almost impossible to keep the bottom rubber covering intact in one piece. The rubber is covering the whole base section and it won’t be a problem without it I guess. This is not an epoxy because it is still gummy and sticky. This is like the adhesive used on the double side tapes. Goo Gone worked well to remove those residues.
Kenn Sakurai -
The rubber cap like bottom can be replaced with easy to cut in shape cork sheet will do. Just rip off the thin strip where the serial number for the ID and other info that might be needed later. Have it glued or put on a clear tape and put it on the side of the white plastic sidewall will do.
Kenn Sakurai -
With age, the rubber becomes brittle. It is best to heat it up with a hair dryer before trying to gently peel it off.
SirDeck -
Mine was probably about 10 years old at this point. I used a clothes iron (flatiron) set on medium heat ("permanent press"), and a piece of "parchment paper" from the kitchen between iron and rubber. After 30 seconds or so, the glue was softened enough that I could lift off the rubber, a little at a time using a putty knife. It all came off in one piece, with essentially all the glue still attached to the rubber. My thanks to the person (forgot the name, it was on one of the "drive replacement" articles for one of the other model Time Capsules) who suggested the iron.
Paul Koning -