Introduction
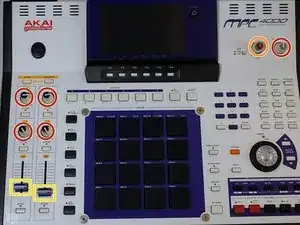
If your MPC 4000 pads respond inconsistently or not at all, it is most likely due to the pad sensor failing in one way or another and will need to be replaced. Thankfully, these can easily be sourced online and replaced relatively simply. In this guide, we will walk through the steps needed to access and replace a faulty pad sensor with a new one. You will need a #1 Phillips and a 3.0 mm Hex driver bit for this operation, as well as a replacement Akai MPC 4000 Pad Sensor.
-
-
Using a #1 Phillips screwdriver, remove a total of (8) 7mm Phillips screws (4 on each side) and remove the panels.
-
-
-
Underneath the front of the device, remove (5) 8mm Phillips screws, flip the device back over and lift off the wrist rest.
-
-
-
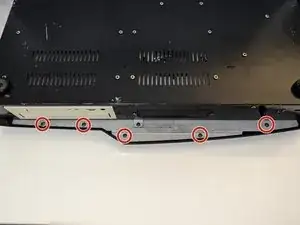
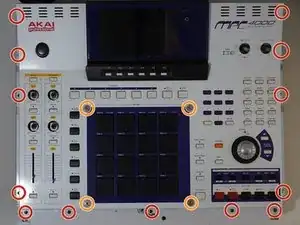
Remove the (13) 8mm Phillips screws on the top of the device.
-
Using a 3mm Hex screwdriver, remove the (4) 7mm Hex screws surrounding the pad.
-
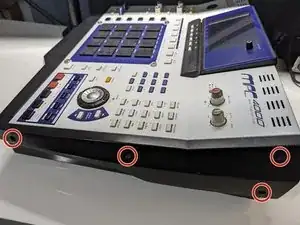
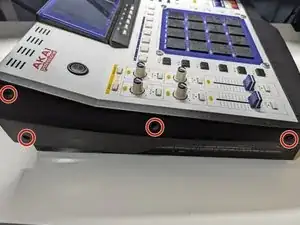
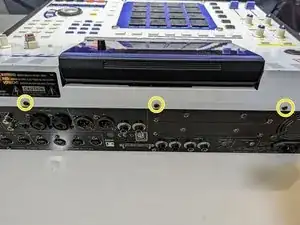
Remove the (3) 8mm Phillips screws on the back of the device.
-
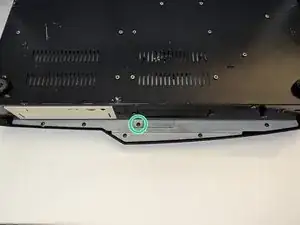
Remove the (1) 8mm Phillips screw underneath the front of the device.
-
-
-
Tilt the LCD display forward to give the panel the clearance it needs to come off, then lift the cover from the device.
-
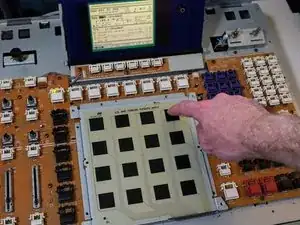
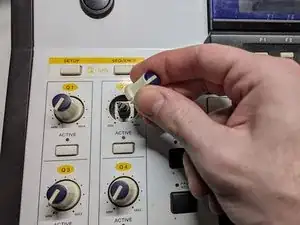
Remove the pad by lifting it off the sensor plate.
-
-
-
Remove (2) 8mm Phillips screws holding the ribbon cable guard in place.
-
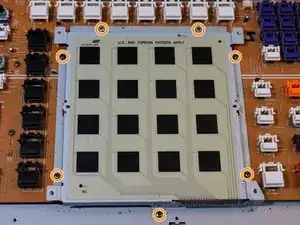
Remove (7) 8mm Phillips screws to free the sensor plate from the board.
-
-
-
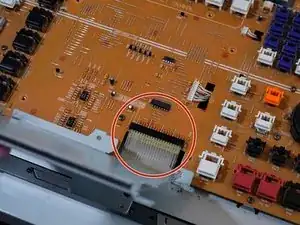
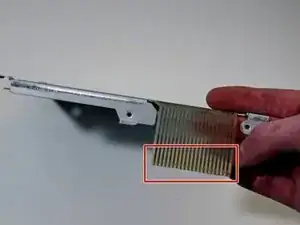
Slowly lift the back of the plate (from the end closest to the LCD screen), and note where the ribbon cable connects to the board.
-
Carefully pull the ribbon cable and plate from the board.
-
-
-
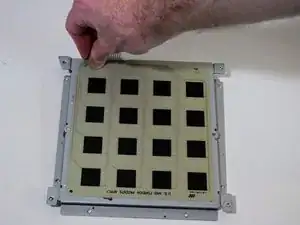
Starting from the corner with the ribbon cable, slowly peel the old pad sensor from the sensor plate.
-
-
-
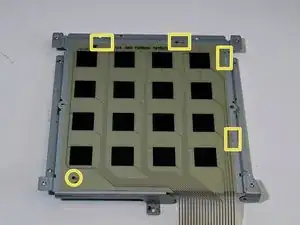
Remove the adhesive backing and carefully apply the new pad sensor. Take note of the marks shown in yellow on the plate to aid in the proper alignment and orientation of the new sensor.
-
Smooth out any air bubbles with a plastic card.
-
-
-
Carefully align the pins of the ribbon cable, and gently guide the cable back into the board applying pressure as needed.
-
-
-
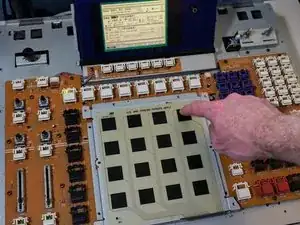
Before reassembly, orient the sensor plate onto the board, power on the device, and ensure all pad sensors are sending a consistent signal to the device.
-


To reassemble your device, follow these instructions in reverse order.
