Introduction

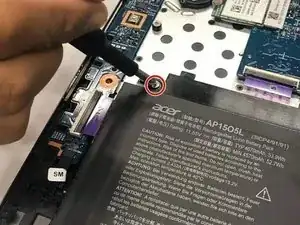
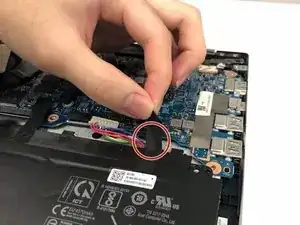
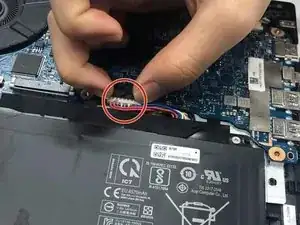
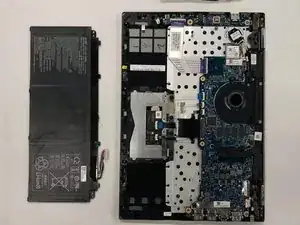
Use this guide to replace the SSD in your device.

  1. 6L5OxjeHfM2NnYKE
    6L5OxjeHfM2NnYKE
    QxVlEhGZgmWOEbMW
    • Be sure to power off and unplug your device before you begin your repair.

    • Remove the twelve screws on the back cover using the Phillips #1 screwdriver.

    Not sure how you removed the back cover with a Philips head. Those are Torx screws. I actually came here to see what size Torx bit I need. Guess I won't find it here.

    Brad F -

  2. m1ZlfrbJh6vuCcKD
    • Use an opening tool to pry the back cover open.

  3. dlAbrTUTMgcZkl3Y
    • Remove two 4 mm screws at the two corners of the battery using the Phillips #1 screwdriver.

  4. JhEh5VZNKViTeEbp
    • Carefully remove the three tapes on the battery.

  5. WgCPHsrVFd6cJV24
    • Carefully slide the battery connector out of its motherboard socket.

  6. oHUeotDI4FGxgVSs
    • Remove the battery from the device.

  7. qIPNyvNwL4dBElPL
    • Disconnect the SSD from the laptop.

    • At the time of guide creation, the device did not come equipped with the SSD.

    That's not the ram, that's the m.2 ssd slot. The ram is soldered to the motherboard. And you don't have to completely remove the battery to access the m.2.

    Crusnik Arucard -

    Thanks for your feedback! We updated the guide to an SSD replacement guide, rather than RAM.

    Kristen Gismondi -

Conclusion

To reassemble your device, follow these instructions in reverse order.

Noah Ryan Collier

Member since: 20/02/20

73 Reputation

2 comments

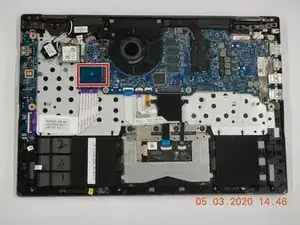
That's not the RAM, that's the m.2 SSD slot. The RAM on this laptop is soldered to the mainboard and cannot be replaced/repaired.

Stephen Feger -

Ok, so they changed this guide from a RAM change to an SSD change. Fine. One thing to point out is that the default m.2 drive for this laptop is a SATA based m.2, not a PCIe. Not sure if it can handle a PCIe m.2 drive.
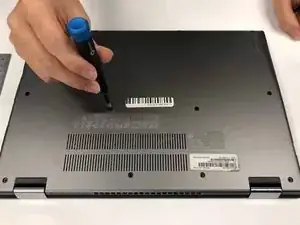
Stephen Feger -