
Introduction
-
-
Release the latches, then slide the battery back to remove it.
-
Release the latch and slide the optical drive out.
-
-
-
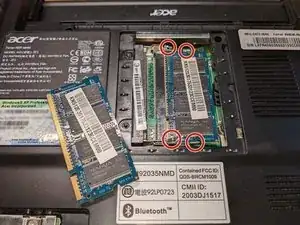
Each stick is held in by two metal clips. You may want to use a small screwdriver or a plastic spudger to release them since they're hard to reach with your finger.
-
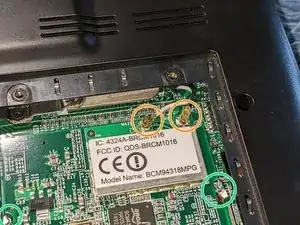
Carefully disconnect the two antenna cables by pulling up on them with a pair of tweezers.
-
The wireless module is held in the same way as the RAM, with two clips and no screws.
-
-
-
Remove the two M2.5 x 3 screws holding the drive cage in, then pull the plastic tab to the left to unplug the drive. Lift it out.
-
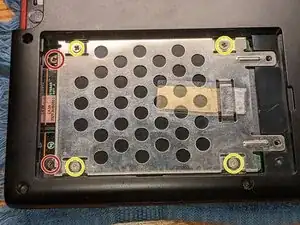
If you intend to replace the drive, remove the four M3 x 4 screws.
-
-
-
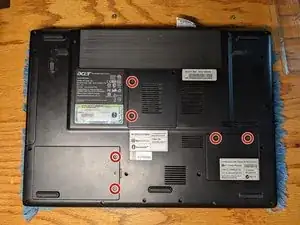
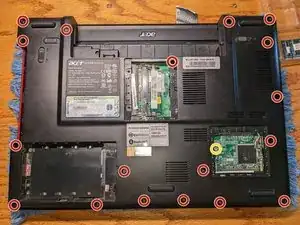
Remove the 3 M2.5 x 3 screws holding the bottom case to the chassis.
-
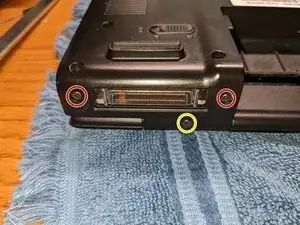
Remove the two M2.5 x 3 screws (one per side) holding the hinge covers to the hinges. Without the screws, the covers should fall off or be easily pulled upwards.
-
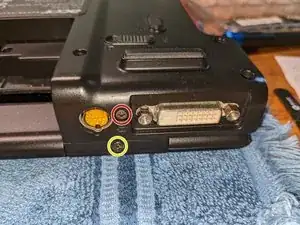
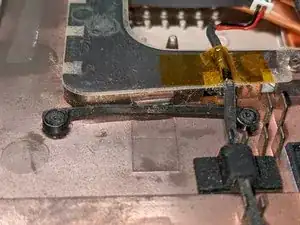
Don't worry about the standoffs for the DVI port yet - we'll get to those later.
-
-
-
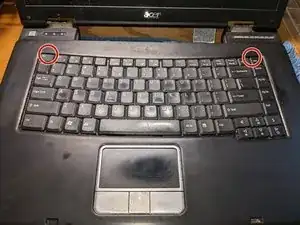
Push in the two latches at the back of the keyboard, then lift the keyboard from the back and gently pull it towards the screen.
-
Release the retaining clip by gently pushing the two tabs away from the connector, then pull the cable out.
-
-
-
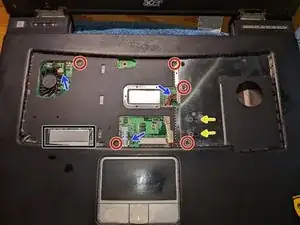
Remove the five M2.5 x 7 screws.
-
Remove the two M2 x 4 screws. I recommend marking the screw holes with a Sharpie so you don't forget where they go, since they're different from the other five.
-
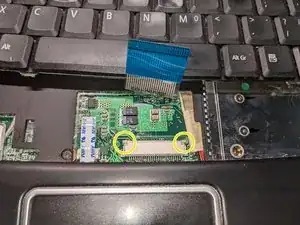
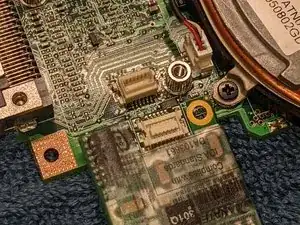
Unplug these three connectors. The ribbon cable at the bottom has no latches. Just pull it out gently.
-
Note the thermal pad on the touchpad bracket. The original ones on mine were pink, not gray; I've already replaced them in this machine.
-
-
-
Lift the top cover from the front and pull it towards you. Be gentle; this will take some fiddling, but it should come out without much force. (Picture TBA)
-
-
-
Disconnect the speaker cables and the modem cable.
-
Disconnect this ribbon cable. I would recommend unplugging it at both ends and removing it entirely.
-
The other end of the modem cable shouldn't be loose on this side of the motherboard. There's a cutout that it feeds through, since the modem is on the other side. I forgot to reconnect it the last time I had this machine apart.
-
-
-
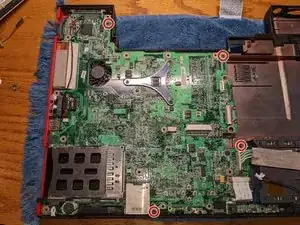
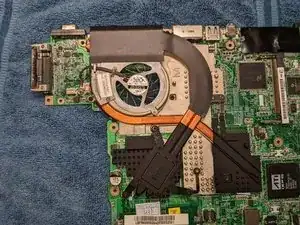
Remove the four screws marked by arrows on the motherboard's silkscreen. Lift the motherboard out of the bottom case. Some wiggling around may be required if it catches on any plastic parts.
-


To reassemble the 4005WLMi, follow these instructions in reverse order, as well as the reassembly notes along the way.