Introduction
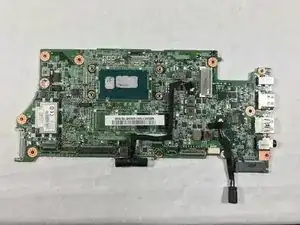
This guide explains how to properly replace the motherboard for the Acer Chromebook C720-2103. This is a difficult replacement and requires the removal of the battery, fan, and solid state drive.
Although motherboard failures are uncommon, if your device has failed and nothing else has resolved the issue, a motherboard replacement might be necessary.
- Be extremely gentle while handling internal components of the device, most are very fragile.
- Make sure the device is powered off during this replacement. There is a possibility of electrocution.
Parts
-
-
Shut the device off.
-
Turn the device over so the bottom is facing up.
-
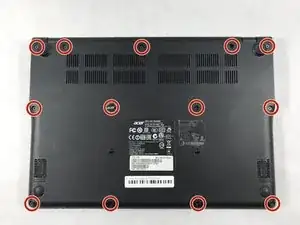
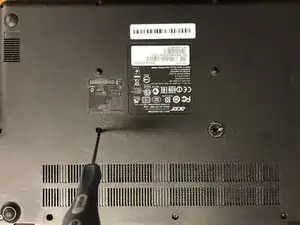
Remove all thirteen 6mm screws using a Phillips #0 screwdriver.
-
-
-
Wedge a plastic opening tool between the back casing and the rest of the device.
-
Apply pressure up and down carefully, until backing pops up. Repeat this process in multiple spots if needed.
-
-
-
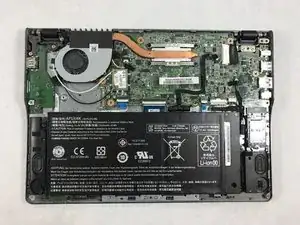
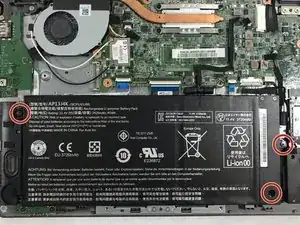
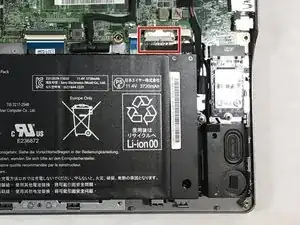
Pull the rainbow cable connector out of the white terminal by wiggling it gently from side to side with your fingers.
-
-
-
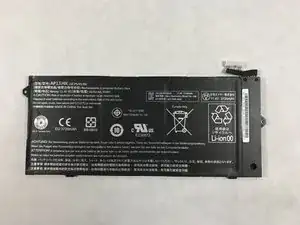
Lift the battery straight up and out of the device with your hands. Take care not to knock the battery against another component.
-
-
-
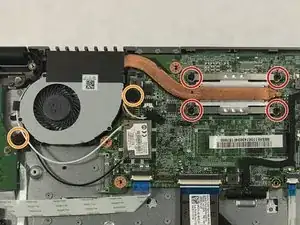
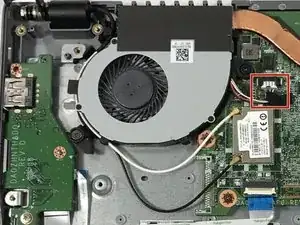
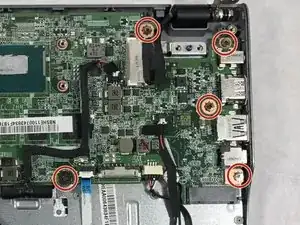
Remove all four 6mm screws attaching the fan to the motherboard with a Phillips #0 screwdriver.
-
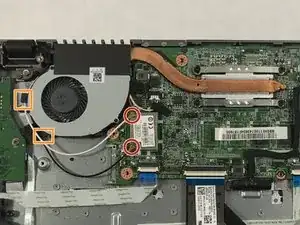
Remove the two 6mm screws attaching the fan to the device base with the Phillips #0 screwdriver.
-
-
-
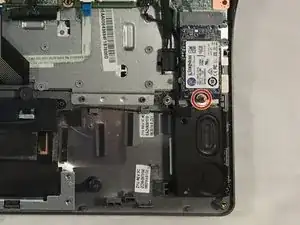
Unsnap the two coaxial connectors from the motherboard.
-
Unhook the coaxial wires from the side of the fan by gently pulling them downward and away from the hooks.
-
-
-
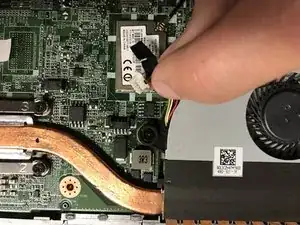
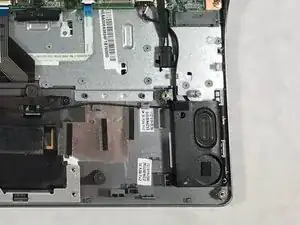
Peel up the tape attaching the rainbow connector wire to the motherboard, but leave the tape attached to the wire itself.
-
Pull the rainbow cable connector out of the black terminal by wiggling it gently from side to side with your fingers.
-
-
-
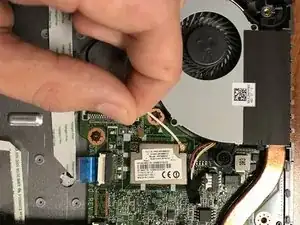
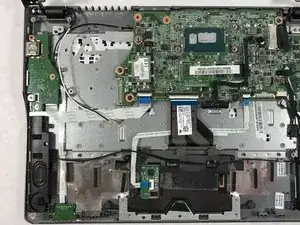
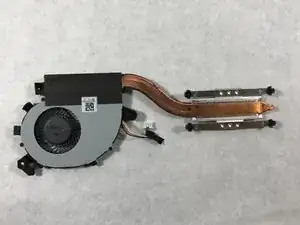
Lift the fan component up and out of device with your hands. Take care not to knock the fan against the motherboard.
-
-
-
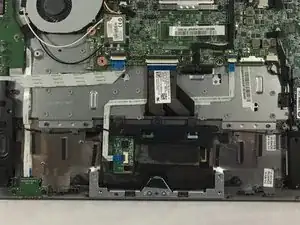
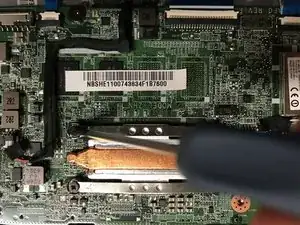
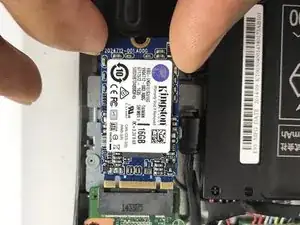
Carefully remove the solid state drive from the solid state drive slot by sliding it downward away from the motherboard.
-
-
-
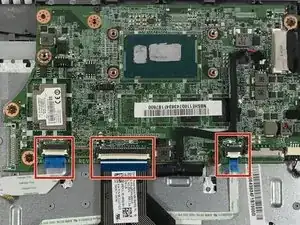
Push the three white hinges upward, gently, with your finger or a spudger. The hinges will move away from the blue tab on the cables. This will release the ribbon cables sandwiched under the hinge.
-
Pull the ribbon cables away from their black bases gently with your fingers. Hold the whole cable by the end with the blue tab, but do not pull on the blue tab alone. That can rip the tab off.
-
-
-
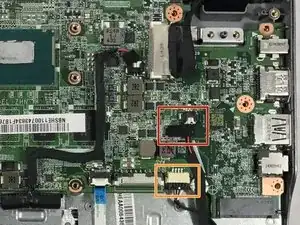
Detach the tape from the motherboard, but leave it attached to the wire itself to avoid damaging the wire.
-
Pull the white cable connector out of the black terminal by wiggling it gently from side to side with your fingers.
-
Pull the black cable connector out of the white terminal by wiggling it gently from side to side with your fingers.
-


To reassemble your device, follow these instructions in reverse order.