
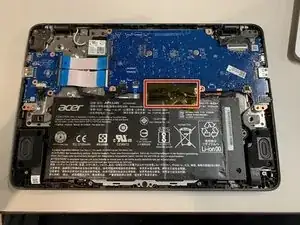
Introduction
-
-
Close your Chromebook and flip it over on its back.
-
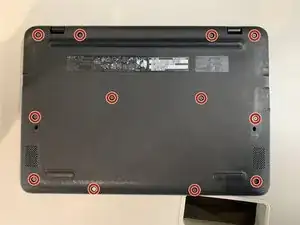
Remove the 12 screws holding on the back cover with a Philips #1 screwdriver.
-
Use a spudger or pry tool to release the clips and remove the back cover.
-
-
-
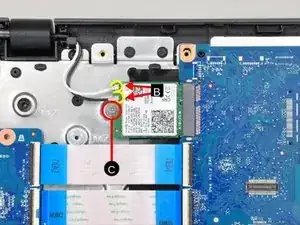
Disconnect the two antenna cables by gently pulling up on them. (labeled "B")
-
Remove the screw holding down the wireless card. (labeled "C")
-
Carefully remove the card by pulling it out of its slot on the motherboard.
-
-
-
Position the new wireless card so that the white label is on top, and the connector is on the right.
-
Insert the wireless card into the connector on the motherboard at a 15-20 degree angle, then press down on the left side until it is flat.
-
Screw in the screw on the left side of the wireless card (labeled "C").
-
Attach the antennas as shown in the picture (white on the top and black on the bottom) by carefully snapping the connectors on using your fingernail or a spudger. (labeled "B")
-
-
-
Align the back cover with the rest of the Chromebook, then press down on the edges to engage the clips.
-
Screw in all 12 screws to hold on the back cover.
-


Congratulations! You just replaced your Chromebook's wireless card.
