Introduction
Our Asus Q536F laptop's present battery has to be replaced and fixed, therefore here is our guide. Your laptop battery will eventually run out of power no matter how well you take care of it. Many last for several years, but ultimately they begin to deteriorate because of things like wear and tear, exposure to intense heat, and even inactivity. This simple-to-follow tutorial will help users prolong the life of their laptops and replace their outdated computer batteries for less money.
Age, damage to the battery charger, or a problem with your laptop's DC connector could all be contributing factors to the battery's poor performance in holding a charge. Make sure the wires are clean and the battery is appropriate for the particular gadget you are using.
Make sure to have the laptop unplugged and powered off before proceeding.
Tools
Parts
-
-
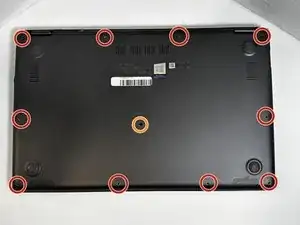
Remove ten 2 mm screws using a Phillips #0 screwdriver.
-
Remove the screw in the center using a T4 Torx screwdriver.
-
Use an iFixit opening tool to pry open the back panel.
-
-
-
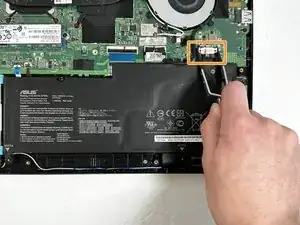
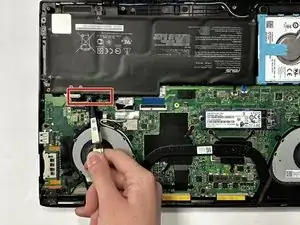
Unhinge the fan cable using your fingers or a pair of tweezers.
-
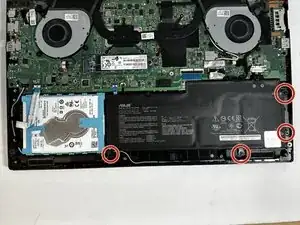
Remove the battery from its slot.
-
To reassemble your device, follow these instructions in reverse order.
One comment
Thank you so much!
Vincent -


