Introduction
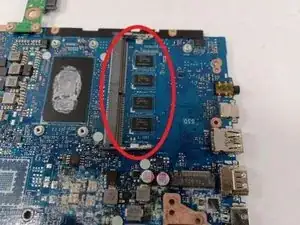
The RAM, (random access memory), helps process the data of your computer to increase speed. Issues with it are very serious, such as intermittent crashing or preventing the computer’s ability to turn on. which can be quite frustrating for the user as it can share symptoms with other failing components. This guide will go through with you step by step on how to replace the RAM of your ASUS Q405U.
-
-
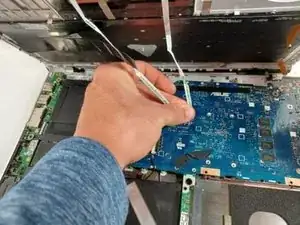
Disconnect the 4 wires attached from the keyboard side of laptop to the screen side of laptop by pulling them out of their sockets on one end (as shown in picture).
-
-
-
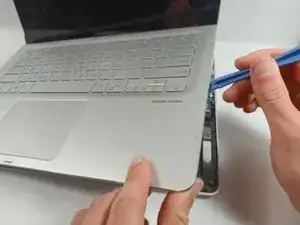
OPTIONAL: Additional pictures to demonstrate moving keyboard out of the way without detaching connections.
-
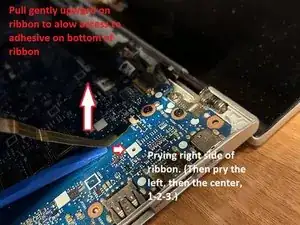
Lift the ribbon cable with gentle pressure, pry the ribbon away from the motherboard on the right side, then the left, then the center, prying away only a little triangle of tape at a time, applying gentle upward pressure to the tape while you loosen and pry.
-
Once you have enough slack in the three ribbons that hold the keyboard down too tightly, lift the front of the keyboard and twist counterclockwise to produce enough room to reach the screws securing the hard drive with your screwdriver.
-


To reassemble your device, follow these instructions in reverse order.