Introduction
-
-
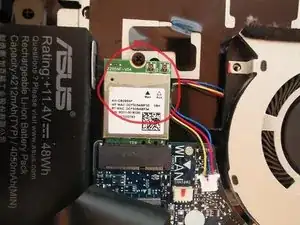
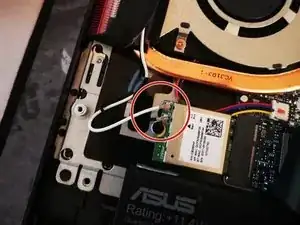
Remove the ducktape form the Wi Fi modul
-
Carefully lift up the black sticky holder, thats holds in space the cables
-
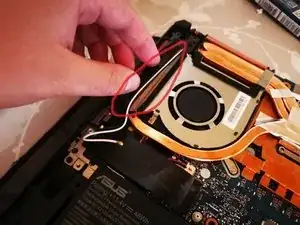
Unplug the cables very carefully
-
-
-
Under the WiFi card you will find more of the cabel holder duck tape.
-
Carefully lift it up and pull out the fan cables
-
-
-
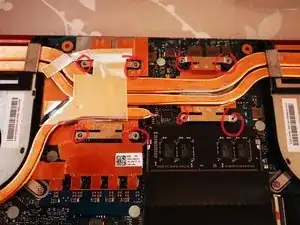
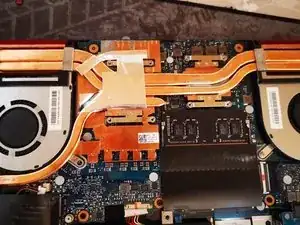
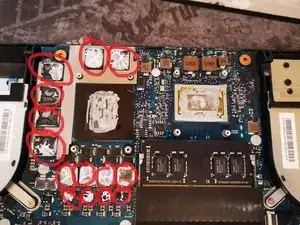
Unscrew the 8 screws which holds in place the heatsink
-
IMPORTANT: By removing the srews you should follow the numbers next to them!!
-
Start from 8 and then 7 ,6, 5, 4, 3, 2, 1
-
-
-
First check again the WiFi antenna cables that they are out of the way!!!
-
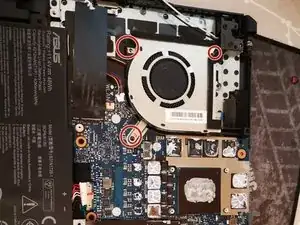
Carefully and slowly lift up the Heatsink starting form right side (if you see exactly whats on the picture)!!
-
-
-
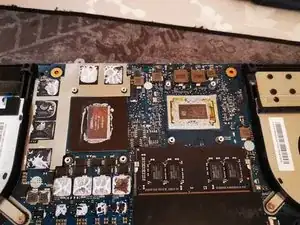
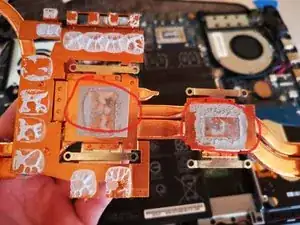
Remove the old thermal paste carefully with aceton and a tissue. If you dont have aceton, you can use just a tissue.
-
-
-
Be careful apply only so many which is necessary!!! In my opinion always check your new paste for conductivity and choose the ones with no eletrical conductivity because if you accidentaly spary on the motherboard you are still safe!!!!
-
-
-
If the paste on the parts on the second picture are still elastic you dont need to replace them
-
-
-
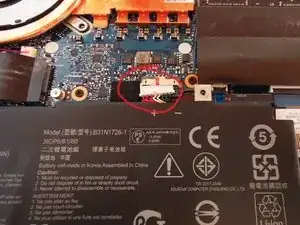
Remove the screws
-
If its unplugged now you can remove the old Fan
-
If your new fan has a duck tape on its one side remove it
-
From the old fan you can find a sticky foam, remove it and place it on the new fan exactly the same way!!!
-
-
-
Before you plug it in REMEMBER the way it was under the wifi card
-
use the strong ducktape to fix in its place
-
after you placed the cables under the ducktape you can plug the fan in
-
-
-
Carefully place the heatsink in its place
-
Scew it done starting from 1 and the 2, 3, 4, 5, 6, 7, 8
-
-
-
Once you have the heatsink in its place drive the cables over the heatsink but under the duck tap (white and black cable)
-
Put the WiFi card in its place
-
Scew it down
-
And plug back the cables
-
Reapply the duck which was on the wifi card!!! Its really important if you have or you want to have a M.2 ssd
-
-
-
Now you are finished
-
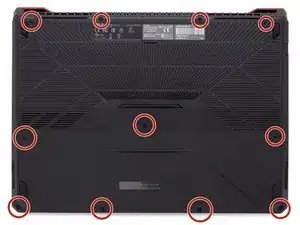
Just put back the cover and screw it down with screws !!!! Watch out they are not the same length!!!
-


To reassemble your device, follow these instructions in reverse order.
