Introduction
This guide provides a detailed set of instructions on how to replace a steering wheel in a 1995 Honda CRV. The steering wheel is an essential component that allows a driver to control the car. If the steering wheel is faulty, damaged, or is not positioned correctly, it may hinder the driver's ability to maneuver the vehicle safely.
Therefore, before replacing the steering wheel, it is crucial to disconnect the battery and take necessary safety precautions to avoid accidental airbag deployment or damage to the steering column. To learn more about the steering wheel removal process and the precautions you need to take note of, you can refer to this informative article.
While the specific instructions may vary depending on the car model, the general process for replacing a steering wheel remains the same. Make sure to follow the instructions carefully to achieve a successful replacement. Finally, after completing the replacement, test the steering wheel to ensure it functions correctly.
Tools
-
-
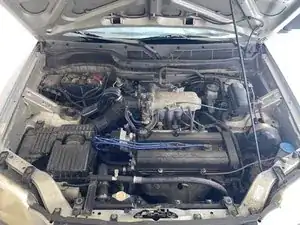
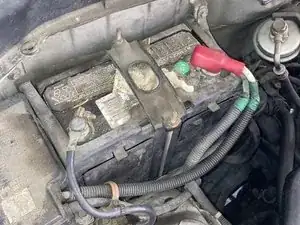
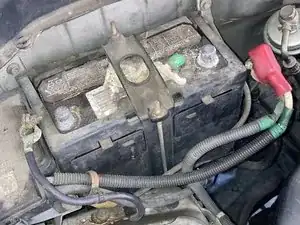
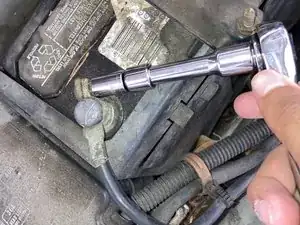
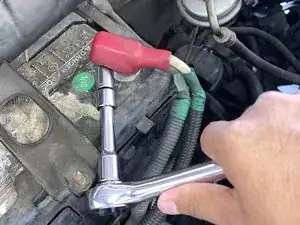
Before replacing your steering wheel you must disconnect the battery terminals. Open the bonnet and locate the negative (-) and positive(+) terminal connection.
-
-
-
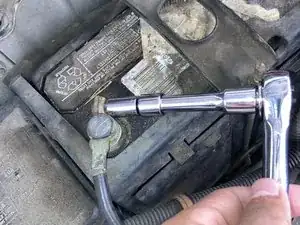
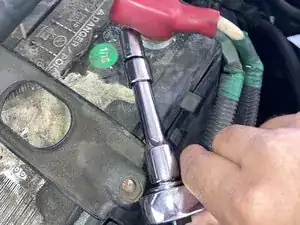
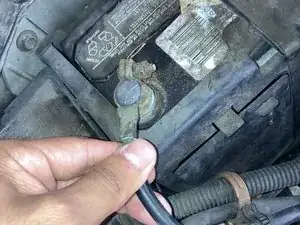
Use a 10 mm socket wrench to loosen each bolt on the two battery connections, and remove the cable (starting with the negative terminal).
-
-
-
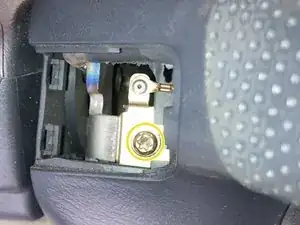
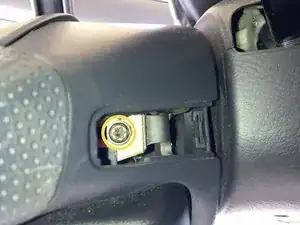
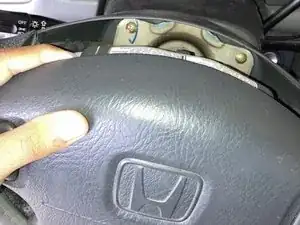
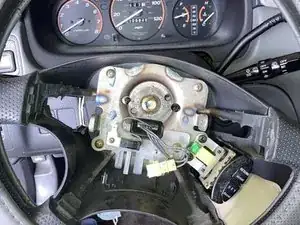
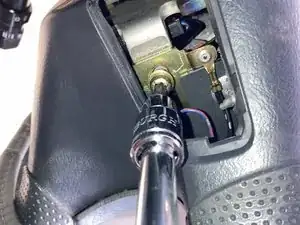
Find the two screws that secure the steering wheel in place and utilize a T30 Torx screwdriver to loosen each bolt.
-
-
-
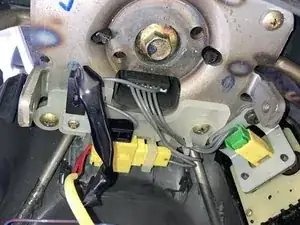
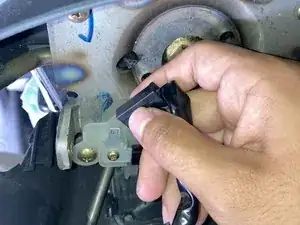
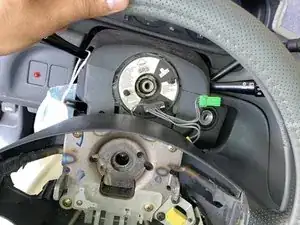
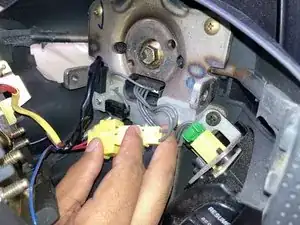
To disconnect the airbag connectors, which are typically yellow in color and located at the bottom of the steering wheel, you need to release two grey hooks that keep them in place. Gently lift up the hooks to unlock the connectors, then carefully remove them.
-
Slide the left connector back, this will enable you to disconnect the right connector.
-
-
-
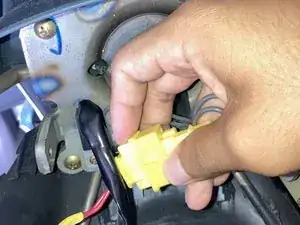
The airbag connection should have either a button or a switch.
-
If there is a button, push it down and then carefully slide the connection up.
-
If there is a switch, carefully toggle it to switch off the horn connector.
-
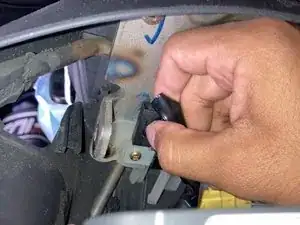
Now that you have disconnected both the airbag and horn connectors, you can safely remove the airbag from the steering wheel.
-
-
-
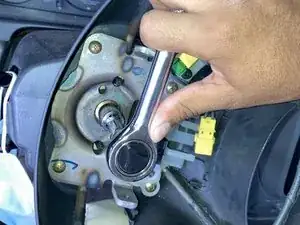
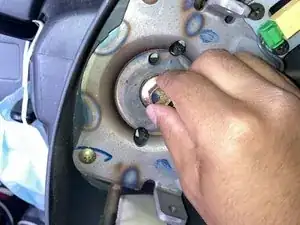
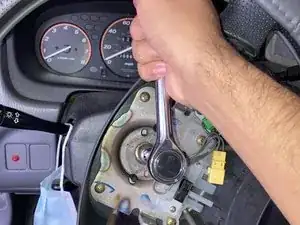
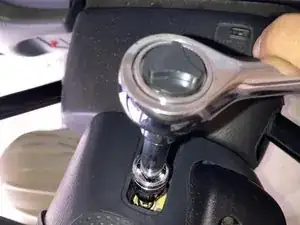
Lock the steering wheel before removing the center bolt. This will help keep the wheel firmly in place and prevent it from moving while you remove the bolt.
-
Use a 14 mm socket wrench to loosen the steering column bolt by turning it counter-clockwise.
-
Carefully pull on the steering wheel. You should feel it come loose from the steering column.
-
-
-
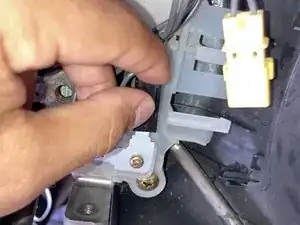
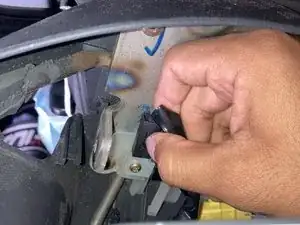
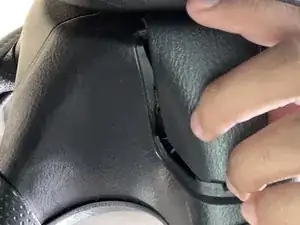
Before removing the steering wheel, it is important to disconnect any other connections that are attached to it. This may include electrical connections for items like cruise control or audio controls. Disconnecting these connections will ensure that the steering wheel can be safely and easily removed from the column.
-
-
-
To install the new steering wheel, align the splines on the steering column with those on the new steering wheel. Carefully press the steering wheel onto the column until it is fully seated. Then, tighten the center bolt using a 14 mm socket wrench in a clockwise rotation.
-
-
-
To reattach the airbag carefully reconnect both the horn and airbag connectors to the back of the airbag module
-
Align the airbag with its mounting location on the steering wheel and secure it
-
-
-
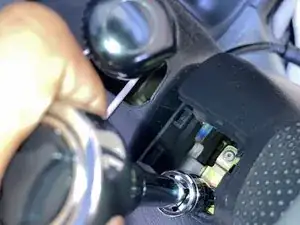
Use a T30 Torx screwdriver to reattach the two Torx screws on either the side or back of your steering wheel, depending on the specific model of your car. Make sure to tighten them securely but not excessively
-
Attach any plastic coverings that were removed earlier during the disassembly process, if applicable to your car model.
-
-
-
Reconnect the battery by first attaching the positive terminal cable and then the negative terminal cable. Use a 10 mm socket wrench to tighten each bolt. It's important to tighten the bolts securely, but be careful not to over-tighten them as this can cause damage to the battery or its connections.
-


Congratulations on successfully reattaching a new steering wheel to your car! Replacing a steering wheel may seem like a daunting task, but by following the proper steps and taking necessary safety precautions, you were able to accomplish it. Remember to take your time and be patient when working on your car. We hope this guide was helpful to you and wish you the best of luck with your newly installed steering wheel.
